DCGAN tensorflow
A tensorflow implementation of "Deep Convolutional Generative Adversarial Networks"
Tensorflow implementation of [Deep Convolutional Generative Adversarial Networks](http://arxiv.org/abs/1511.06434) which is a stabilize Generative Adversarial Networks. The referenced torch code can be found [here](https://github.com/soumith/dcgan.torch). The project is written primarily in JavaScript, distributed under the MIT License license, first published in 2015. It has gained significant community traction with 7,185 stars and 2,590 forks on GitHub. Key topics include: dcgan, gan, generative-model, tensorflow.
DCGAN in Tensorflow
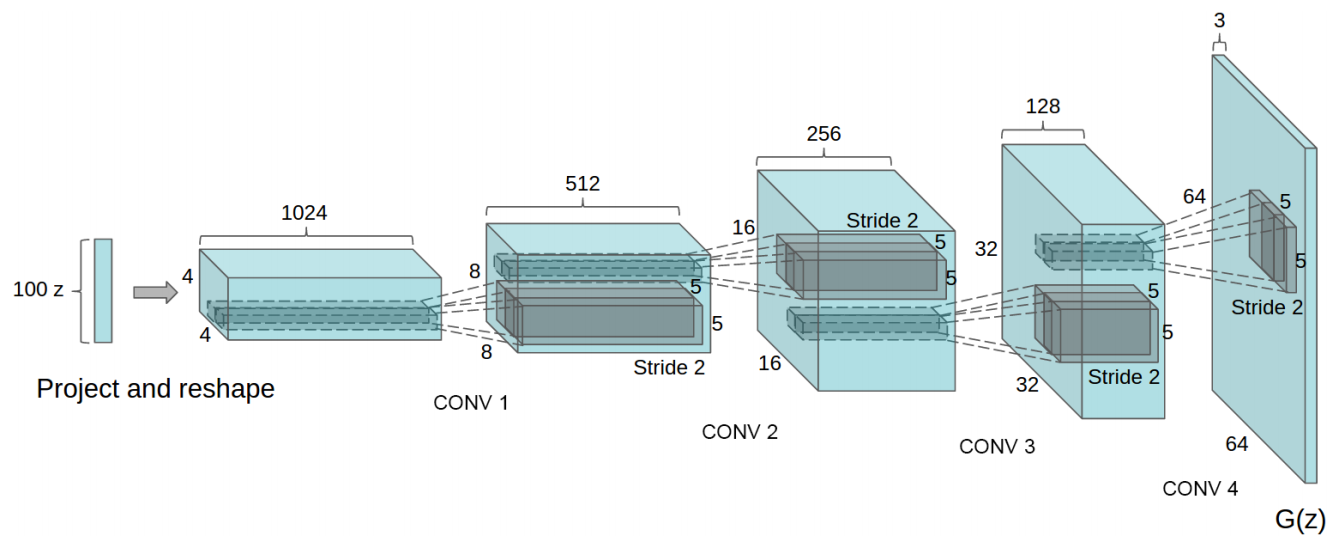
Tensorflow implementation of Deep Convolutional Generative Adversarial Networks which is a stabilize Generative Adversarial Networks. The referenced torch code can be found here.
- Brandon Amos wrote an excellent blog post and image completion code based on this repo.
- To avoid the fast convergence of D (discriminator) network, G (generator) network is updated twice for each D network update, which differs from original paper.
Online Demo
<img src="https://raw.githubusercontent.com/carpedm20/blog/master/content/images/face.png">
Prerequisites
- Python 2.7 or Python 3.3+
- Tensorflow 0.12.1
- SciPy
- pillow
- tqdm
- (Optional) moviepy (for visualization)
- (Optional) Align&Cropped Images.zip : Large-scale CelebFaces Dataset
Usage
First, download dataset with:
$ python download.py mnist celebA
To train a model with downloaded dataset:
$ python main.py --dataset mnist --input_height=28 --output_height=28 --train
$ python main.py --dataset celebA --input_height=108 --train --crop
To test with an existing model:
$ python main.py --dataset mnist --input_height=28 --output_height=28
$ python main.py --dataset celebA --input_height=108 --crop
Or, you can use your own dataset (without central crop) by:
$ mkdir data/DATASET_NAME
... add images to data/DATASET_NAME ...
$ python main.py --dataset DATASET_NAME --train
$ python main.py --dataset DATASET_NAME
$ # example
$ python main.py --dataset=eyes --input_fname_pattern="*_cropped.png" --train
If your dataset is located in a different root directory:
$ python main.py --dataset DATASET_NAME --data_dir DATASET_ROOT_DIR --train
$ python main.py --dataset DATASET_NAME --data_dir DATASET_ROOT_DIR
$ # example
$ python main.py --dataset=eyes --data_dir ../datasets/ --input_fname_pattern="*_cropped.png" --train
Results
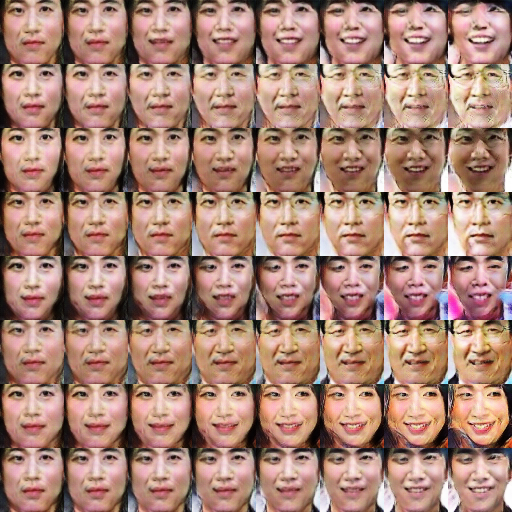
celebA
After 6th epoch:
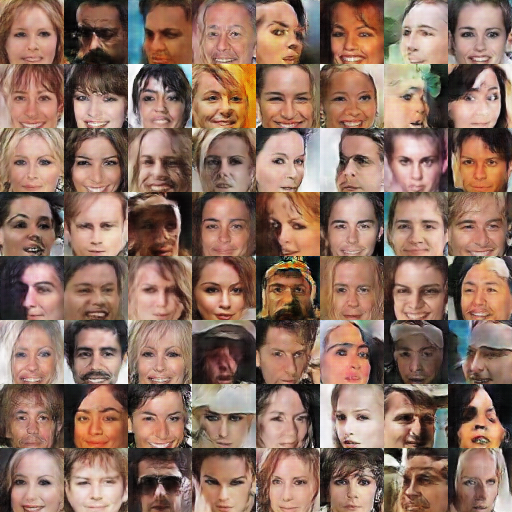
After 10th epoch:

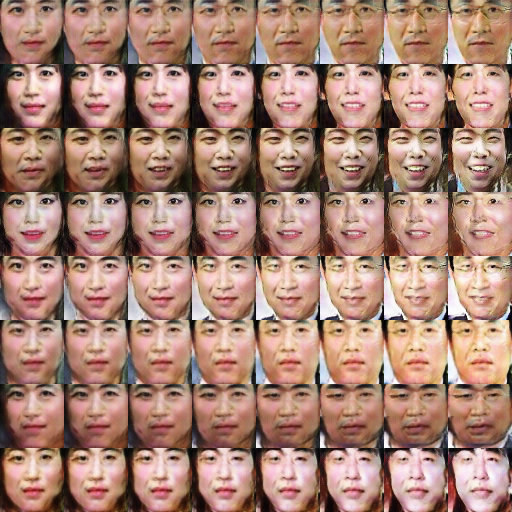
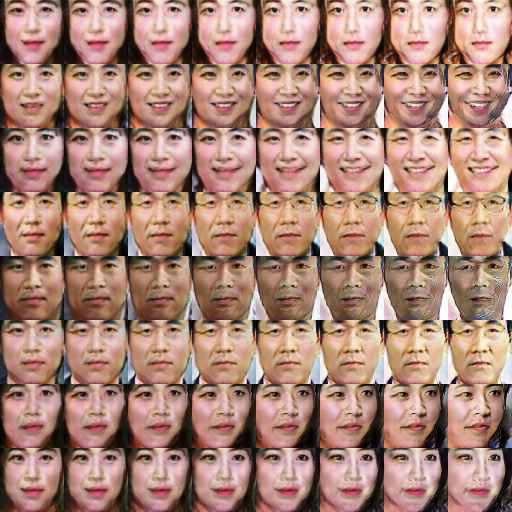
Asian face dataset
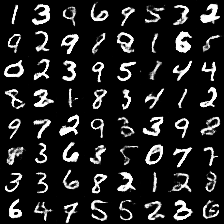
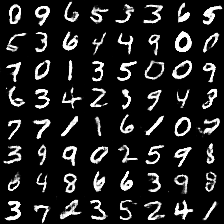
MNIST
MNIST codes are written by @PhoenixDai.
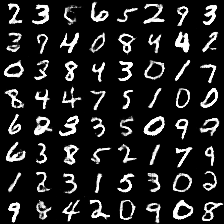
More results can be found here and here.
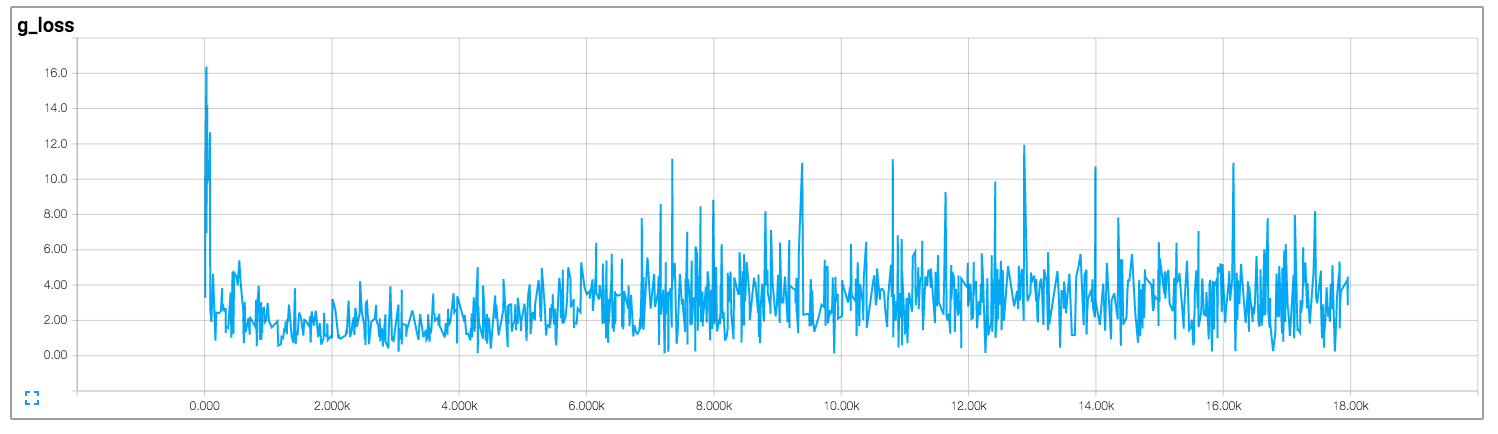
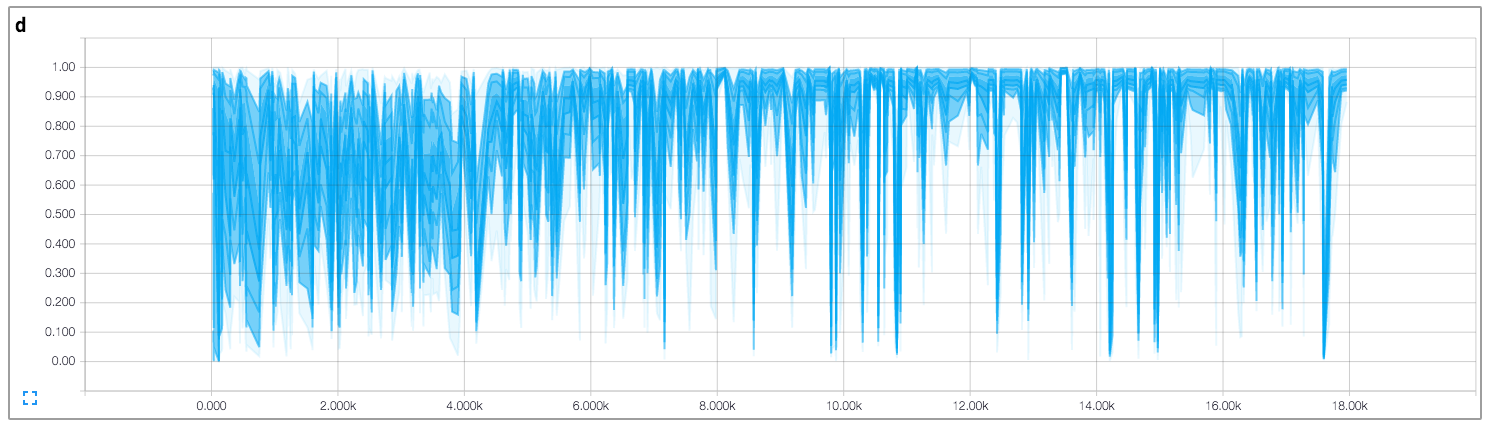
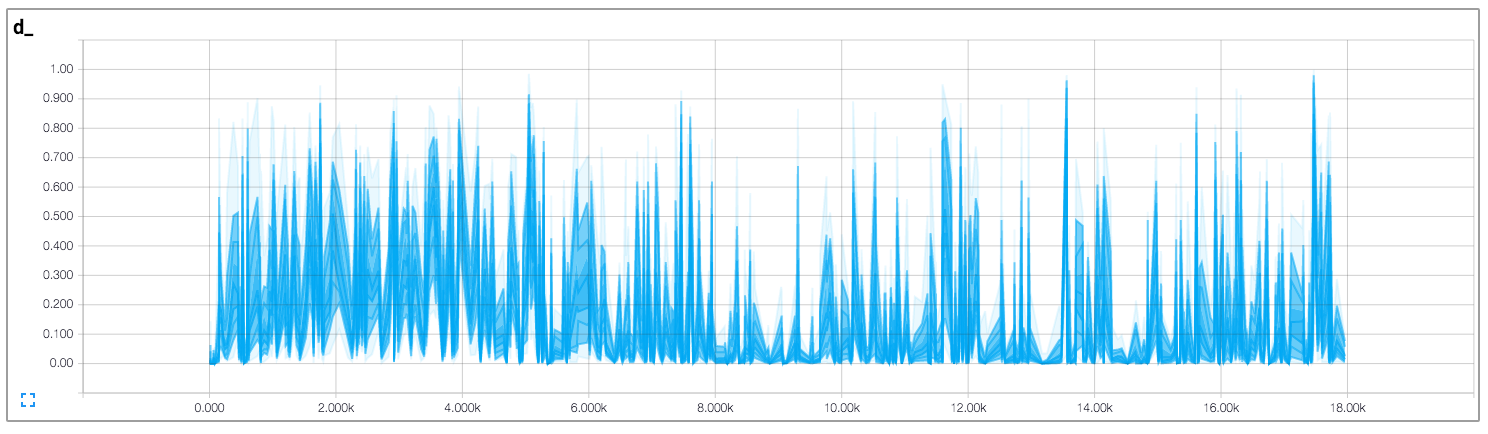
Training details
Details of the loss of Discriminator and Generator (with custom dataset not celebA).

Details of the histogram of true and fake result of discriminator (with custom dataset not celebA).
Related works
Author
Taehoon Kim / @carpedm20
Contributors
Showing top 12 contributors by commit count.


Related Repositories

phillipi/pix2pix
Image-to-image translation with conditional adversarial nets

junyanz/iGAN
Interactive Image Generation via Generative Adversarial Networks

yfeng95/GAN
Resources and Implementations of Generative Adversarial Nets: GAN, DCGAN, WGAN, CGAN, InfoGAN

tjwei/GANotebooks
wgan, wgan2(improved, gp), infogan, and dcgan implementation in lasagne, keras, pytorch

GANs-in-Action/gans-in-action
Companion repository to GANs in Action: Deep learning with Generative Adversarial Networks

jacobgil/keras-dcgan
Keras implementation of Deep Convolutional Generative Adversarial Networks