Attendance system
A simple, modern and scalable facial recognition based attendance system built with Python back-end & Angular front-end.
> A simple, modern and scalable facial recognition based attendance system > built with Python back-end & Angular front-end. The project is written primarily in Python, distributed under the MIT License license, first published in 2019. Key topics include: angular, attendance, attendance-system, command-line, deep-learning.
A simple, modern and scalable facial recognition based attendance system
built with Python back-end & Angular front-end.
Table of contents
Prerequisites
- Windows or Linux (macOS not officially supported, but might work)
- Nvidia CUDA (optional - for nvidia gpus)
- CMake
- Visual Studio Build Tools
- Miniconda for Python v3.7+
- Node.js LTS v12.8.3+ (npm v6.14.6+)
- Angular CLI v10.1.2+
Installation
1. Setup backend
Install all dependencies using conda package manager
Note: This will install the dependencies listed in
environments.ymlfile
sh$ cd backend $ conda env create -f environment.yml
Now you can activate this environment using the following command
Note: You can run the app only if this environment is activated
sh$ conda activate attendance-system
2. Setup frontend
Install all dependencies using npm package manager
Note: This will install the dependencies listed in
package.jsonfile
sh$ cd frontend $ npm install
Usage
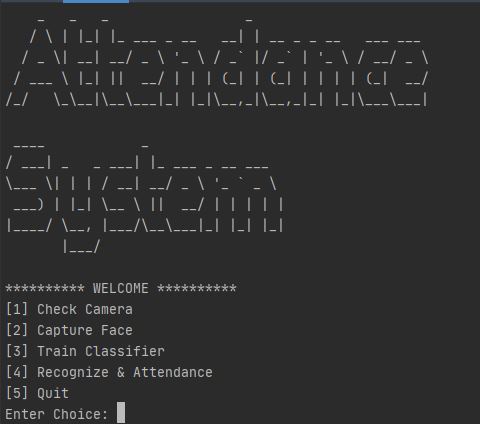
A. Using CLI
Follow these steps to run the app in command line interface mode
- Activate the
attendance-systemconda environment - Launch
run_cli.pyfrom the backend directory
sh$ cd backend $ conda activate attendance-system $ python run_cli.py
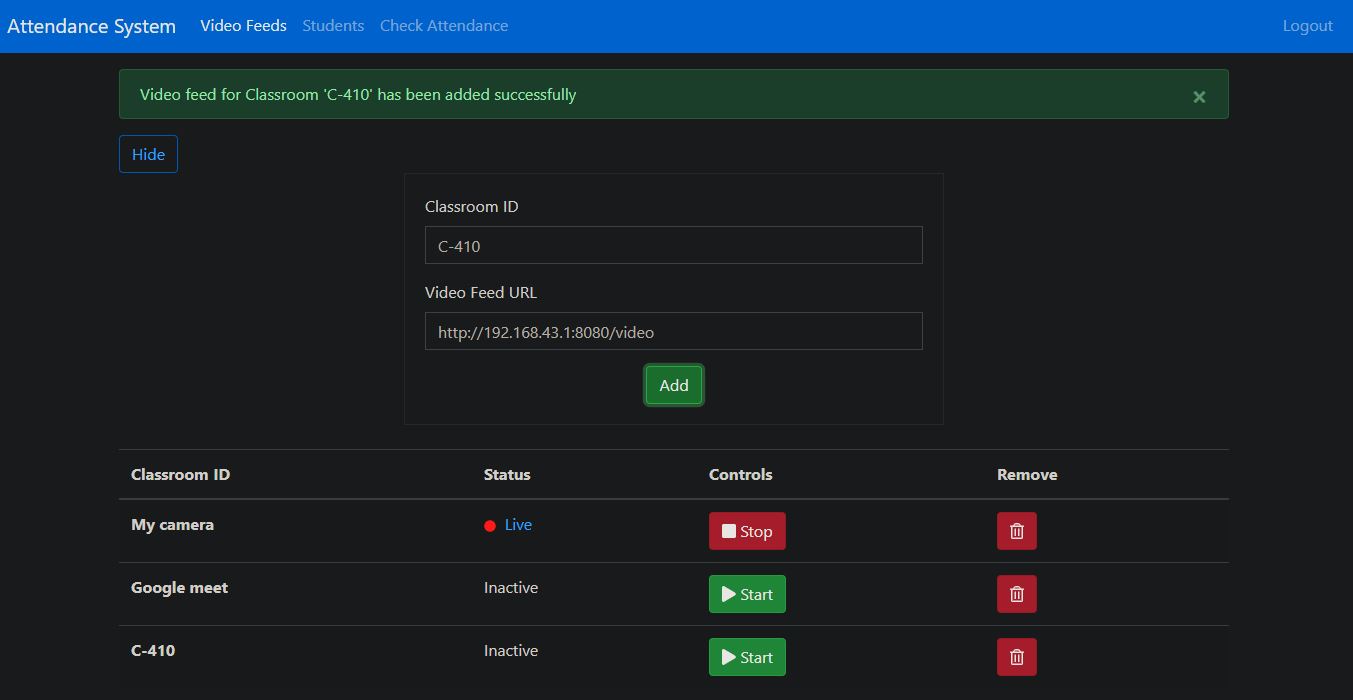
B. Using Web Interface
Start the Flask Web Server
- Rename
.env.examplefile to.env - Activate the
attendance-systemconda environment - Launch
run.pyfrom the backend directory
Note: This will start a flask web server listening on
http://localhost:5000
sh$ cd backend $ conda activate attendance-system $ python run.py
Launch the Angular Web Application
Note: This will launch angular web app in browser @
http://localhost:4200
sh$ cd frontend $ ng serve -o
🤝 Contributing
Contributions, issues and feature requests are welcome!<br />Feel free to check issues page.
Show your support
Give a ⭐️ if this project helped you!
Contributors
Showing top 3 contributors by commit count.


![dependabot[bot]](https://avatars.githubusercontent.com/in/29110?v=4)