Sdf
Simple SDF mesh generation in Python
Generate 3D meshes based on SDFs (signed distance functions) with a dirt simple Python API. The project is written primarily in Python, distributed under the MIT License license, first published in 2021. It has gained significant community traction with 1,978 stars and 168 forks on GitHub. Key topics include: 3d, 3d-models, 3d-printing, mesh, python.
sdf
Generate 3D meshes based on SDFs (signed distance functions) with a
dirt simple Python API.
Special thanks to Inigo Quilez for his excellent documentation on signed distance functions:
Example
<img width=350 align="right" src="docs/images/example.png">Here is a complete example that generates the model shown. This is the
canonical Constructive Solid Geometry
example. Note the use of operators for union, intersection, and difference.
pythonfrom sdf import * f = sphere(1) & box(1.5) c = cylinder(0.5) f -= c.orient(X) | c.orient(Y) | c.orient(Z) f.save('out.stl')
Yes, that's really the entire code! You can 3D print that model or use it
in a 3D application.
More Examples
Have a cool example? Submit a PR!
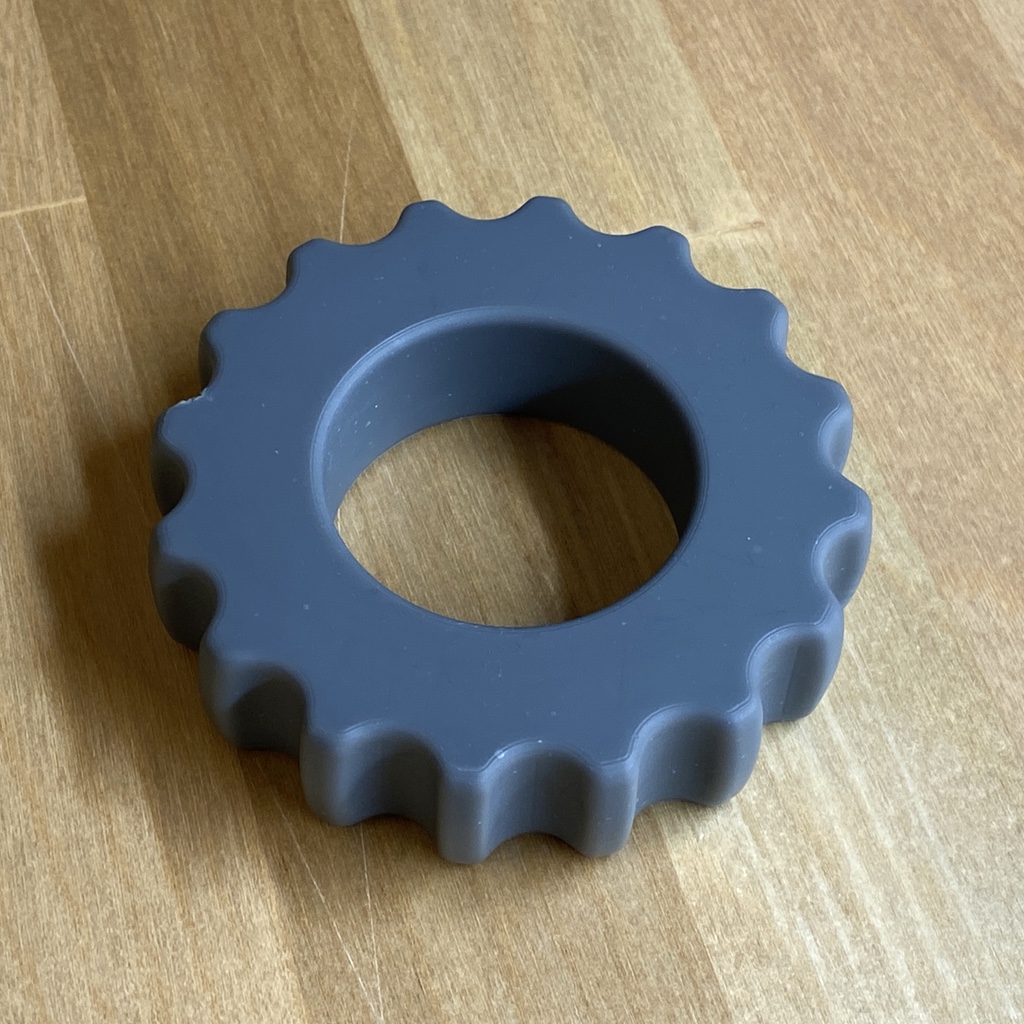
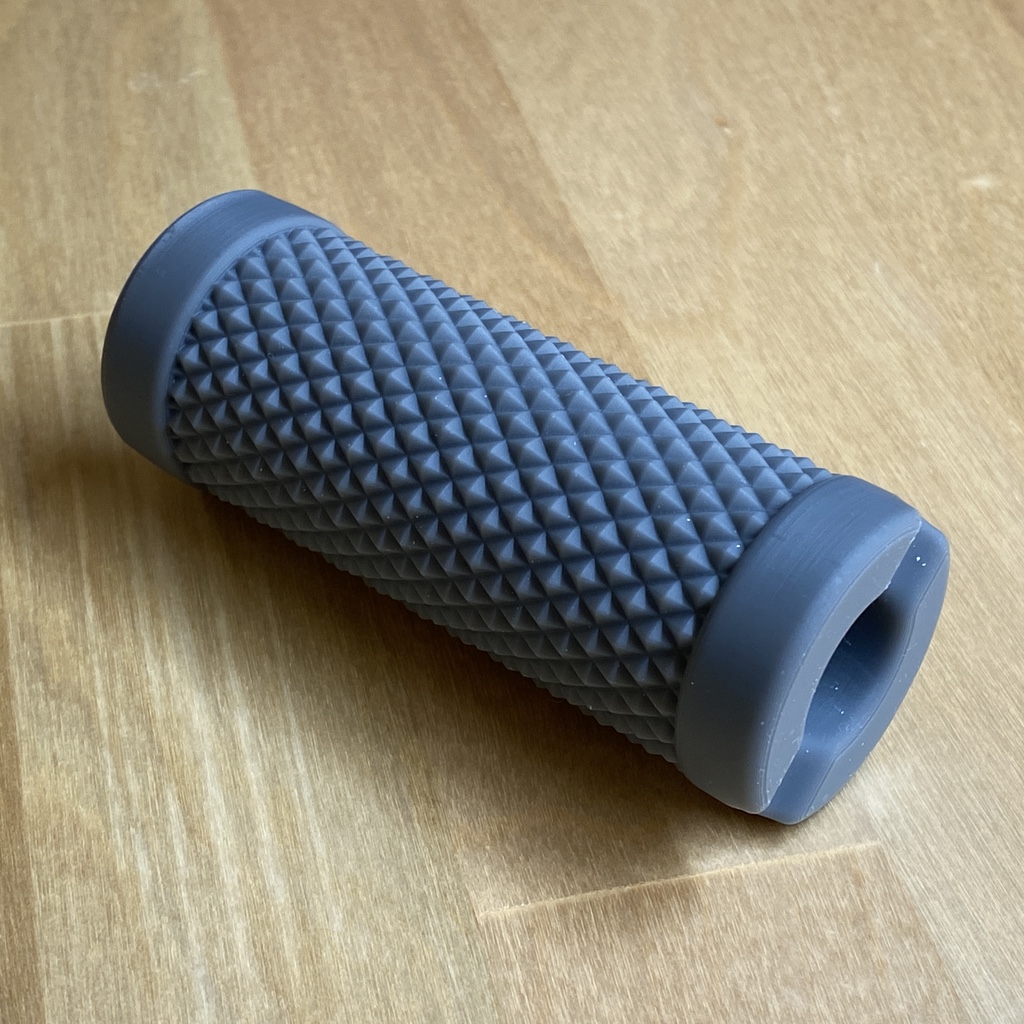
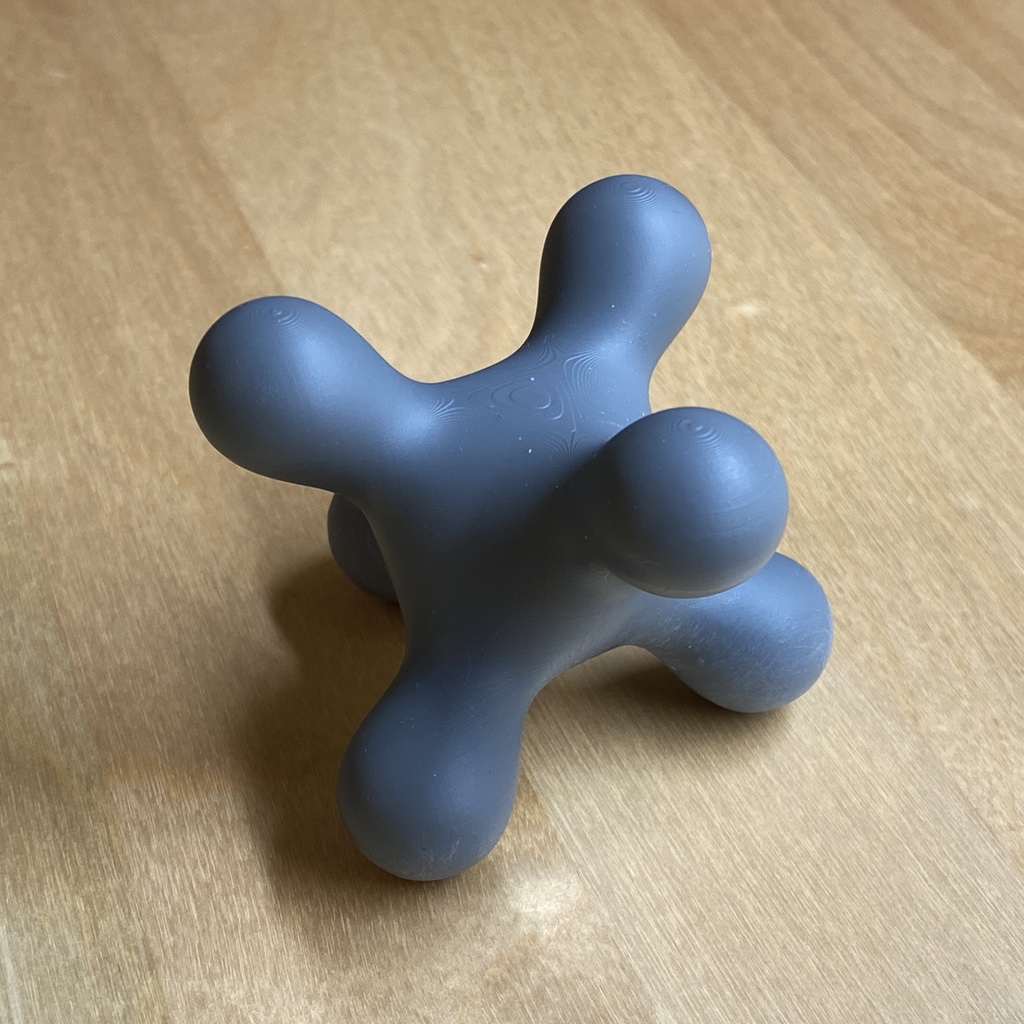
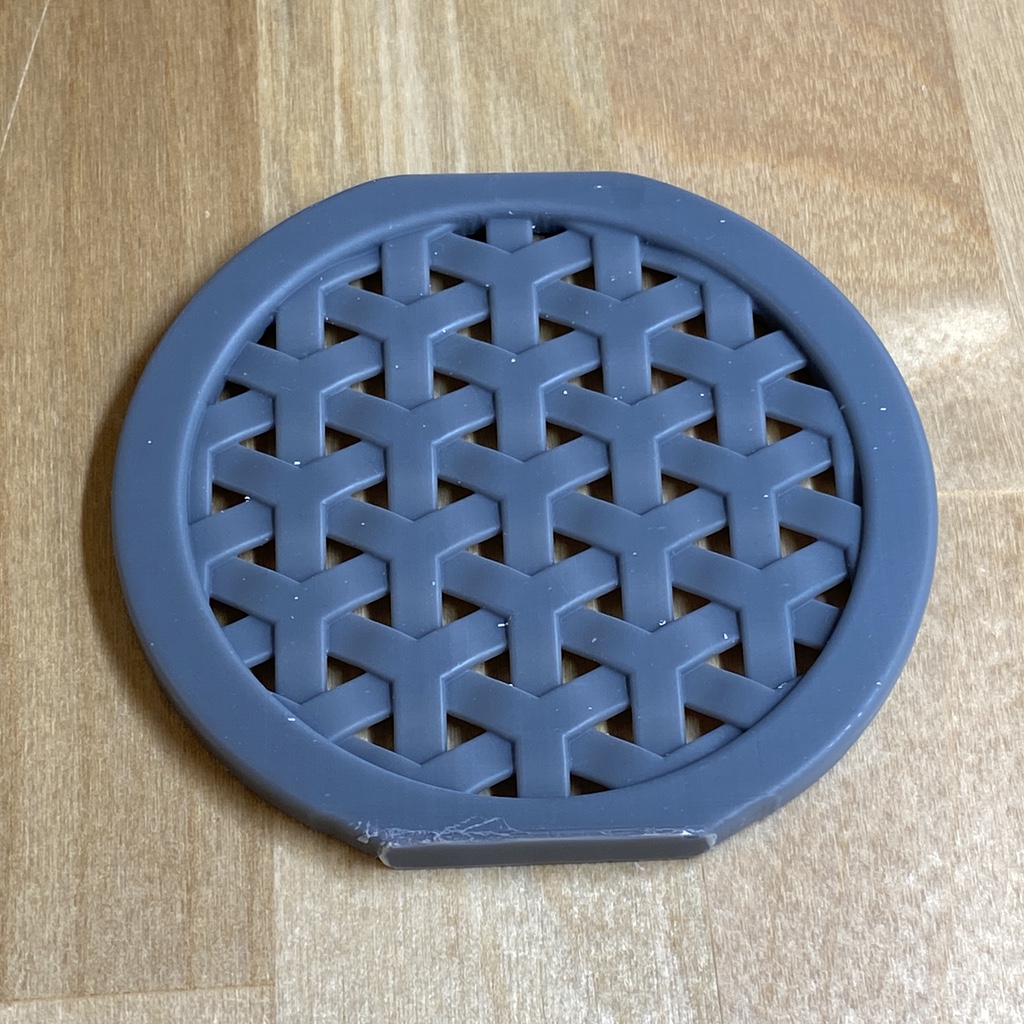
| gearlike.py | knurling.py | blobby.py | weave.py |
|---|---|---|---|
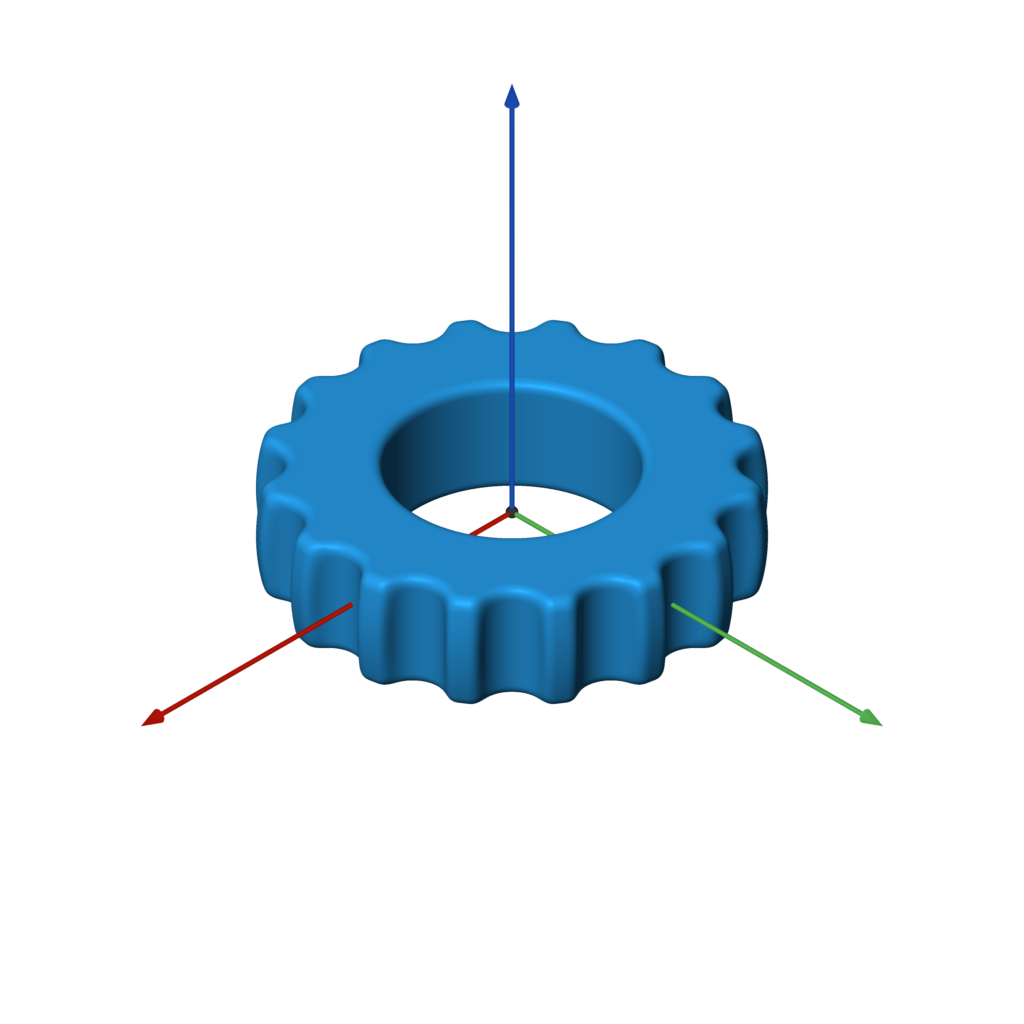 | 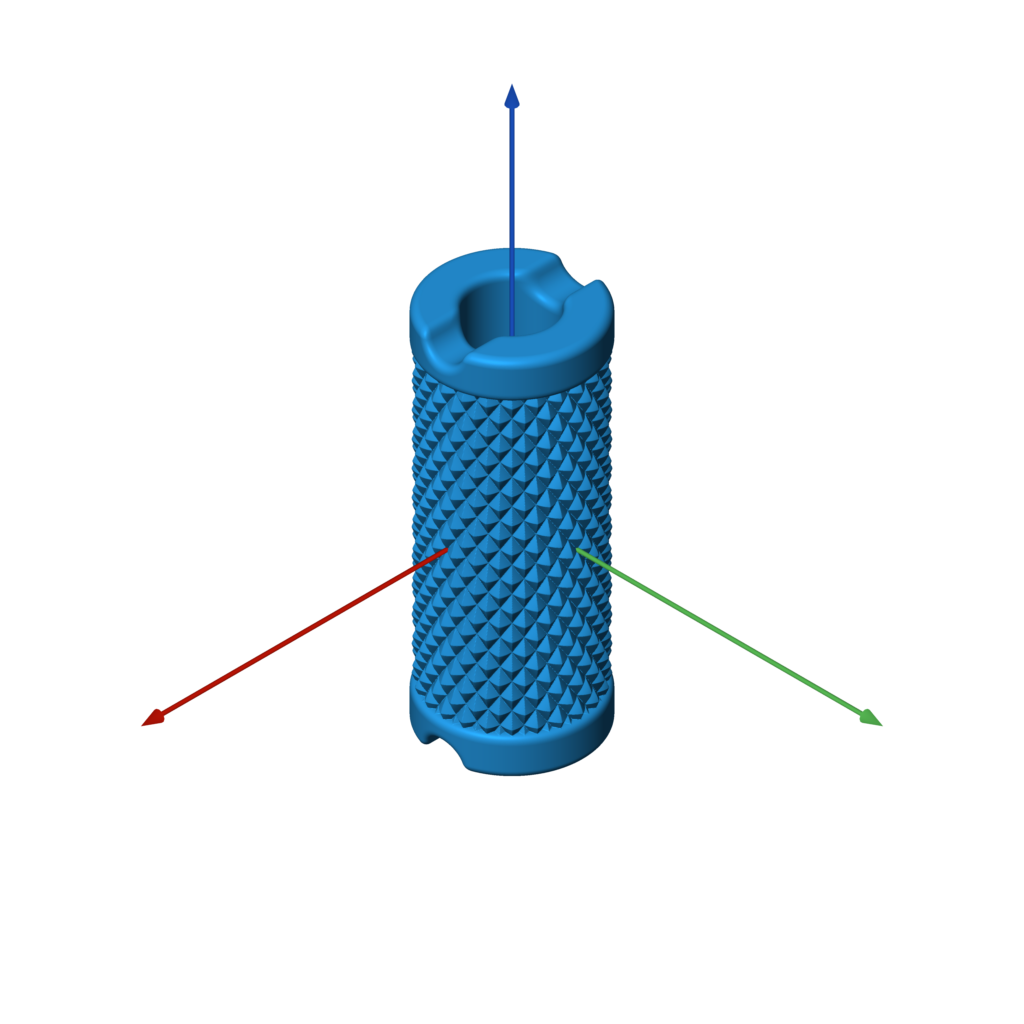 | 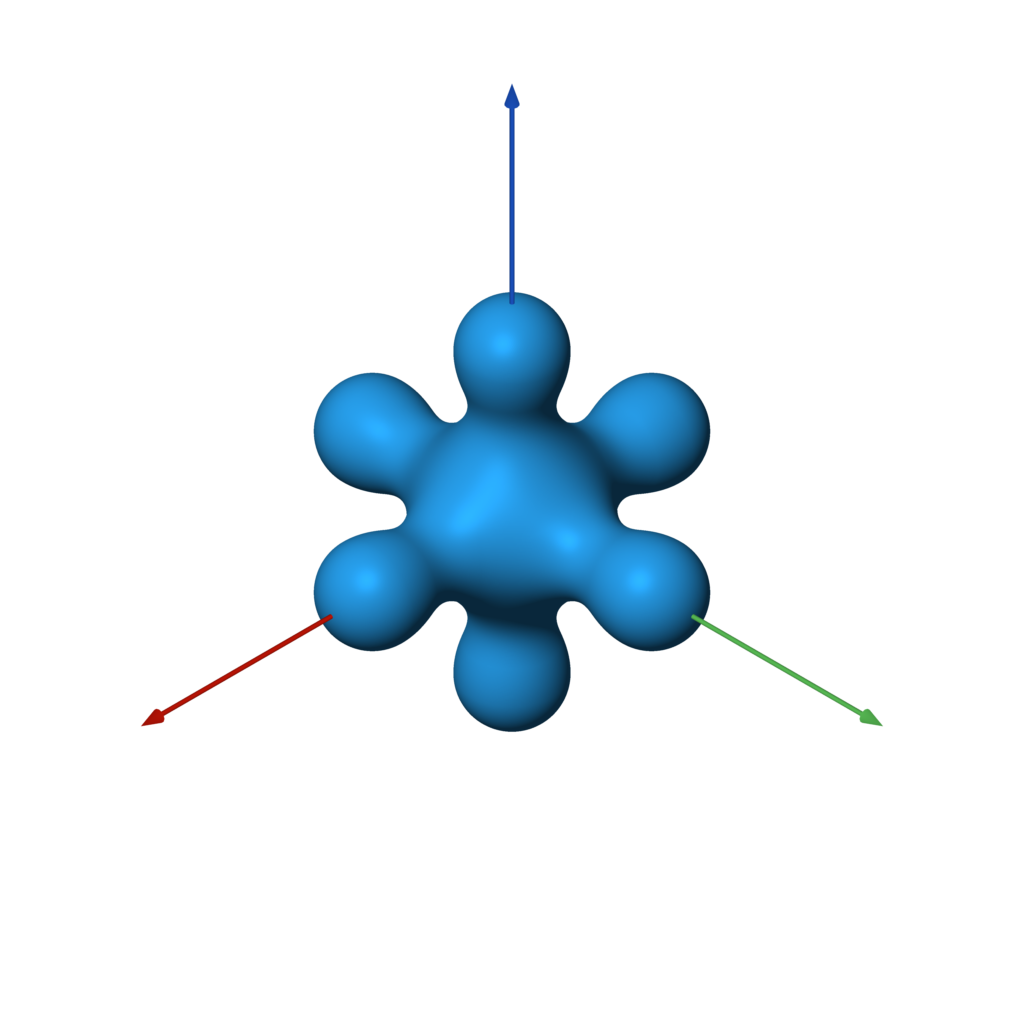 | 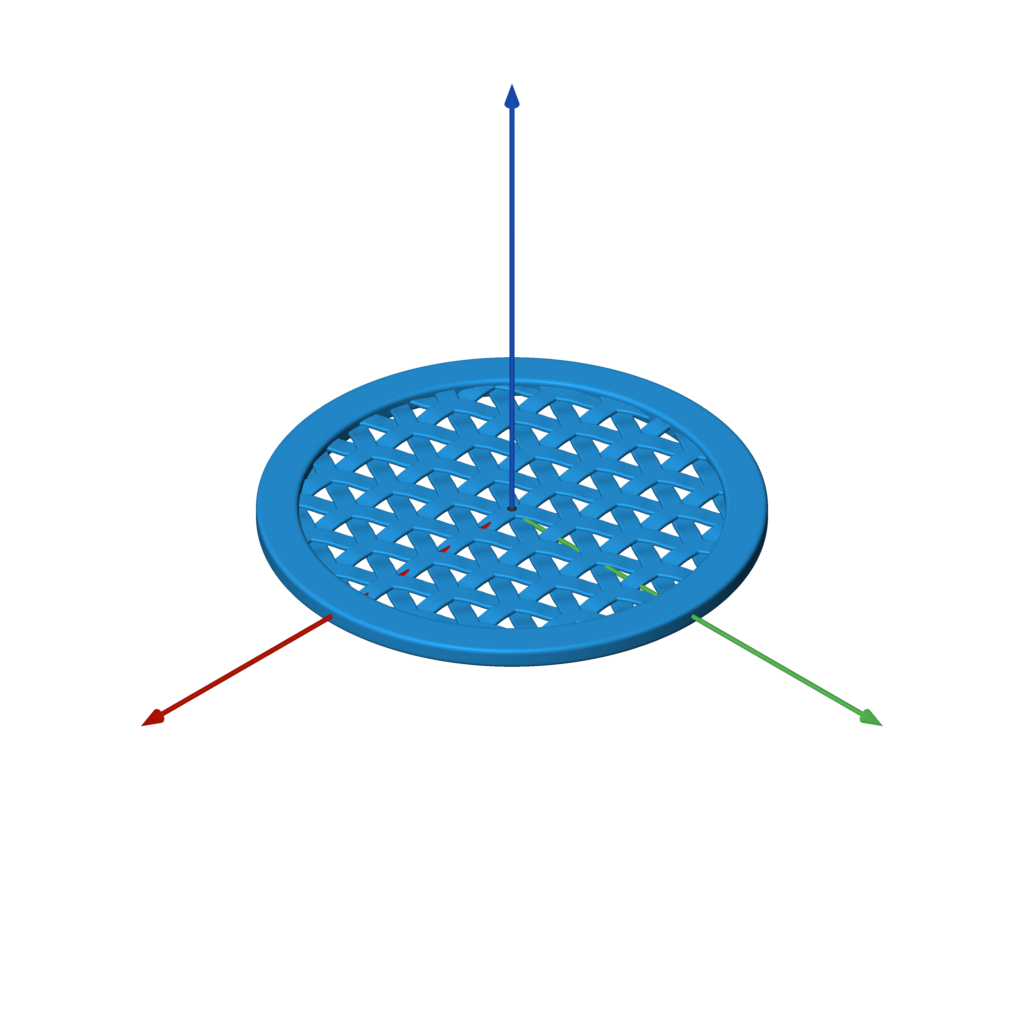 |
 |  |  |  |
Requirements
Note that the dependencies will be automatically installed by setup.py when
following the directions below.
- Python 3
- matplotlib
- meshio
- numpy
- Pillow
- scikit-image
- scipy
Installation
Use the commands below to clone the repository and install the sdf library
in a Python virtualenv.
bashgit clone https://github.com/fogleman/sdf.git cd sdf virtualenv env . env/bin/activate pip install -e .
Confirm that it works:
bashpython examples/example.py # should generate a file named out.stl
You can skip the installation if you always run scripts that import sdf
from the root folder.
OpenVDB
OpenVDB and its Python module are also required if you want to use meshes as SDFs.
It doesn't seem like this can easily be installed via pip. The basic approach for
building it is as follows:
bashgit clone https://github.com/AcademySoftwareFoundation/openvdb.git cd openvdb mkdir build cd build cmake -D OPENVDB_BUILD_PYTHON_MODULE=ON -D USE_NUMPY=ON .. make -j8 cp openvdb/openvdb/python/pyopenvdb.* `python -c 'import site; print(site.getsitepackages()[0])'`
File Formats
sdf natively writes binary STL files. For other formats, meshio
is used (based on your output file extension). This adds support for over 20 different 3D file formats,
including OBJ, PLY, VTK, and many more.
Viewing the Mesh
<img width=250 align="right" src="docs/images/meshview.png">Find and install a 3D mesh viewer for your platform, such as MeshLab.
I have developed and use my own cross-platform mesh viewer called meshview (see screenshot).
Installation is easy if you have Go and glfw installed:
bash$ brew install go glfw # on macOS with homebrew $ go get -u github.com/fogleman/meshview/cmd/meshview
Then you can view any mesh from the command line with:
bash$ meshview your-mesh.stl
See the meshview README for more complete installation instructions.
On macOS you can just use the built-in Quick Look (press spacebar after selecting the STL file in Finder) in a pinch.
API
In all of the below examples, f is any 3D SDF, such as:
pythonf = sphere()
Bounds
The bounding box of the SDF is automatically estimated. Inexact SDFs such as
non-uniform scaling may cause issues with this process. In that case you can
specify the bounds to sample manually:
pythonf.save('out.stl', bounds=((-1, -1, -1), (1, 1, 1)))
Resolution
The resolution of the mesh is also computed automatically. There are two ways
to specify the resolution. You can set the resolution directly with step:
pythonf.save('out.stl', step=0.01) f.save('out.stl', step=(0.01, 0.02, 0.03)) # non-uniform resolution
Or you can specify approximately how many points to sample:
pythonf.save('out.stl', samples=2**24) # sample about 16M points
By default, samples=2**22 is used.
Tip: Use the default resolution while developing your SDF. Then when you're done,
crank up the resolution for your final output.
Batches
The SDF is sampled in batches. By default the batches have 32**3 = 32768
points each. This batch size can be overridden:
pythonf.save('out.stl', batch_size=64) # instead of 32
The code attempts to skip any batches that are far away from the surface of
the mesh. Inexact SDFs such as non-uniform scaling may cause issues with this
process, resulting in holes in the output mesh (where batches were skipped when
they shouldn't have been). To avoid this, you can disable sparse sampling:
pythonf.save('out.stl', sparse=False) # force all batches to be completely sampled
Worker Threads
The SDF is sampled in batches using worker threads. By default,
multiprocessing.cpu_count() worker threads are used. This can be overridden:
pythonf.save('out.stl', workers=1) # only use one worker thread
Without Saving
You can of course generate a mesh without writing it to an STL file:
pythonpoints = f.generate() # takes the same optional arguments as `save` print(len(points)) # print number of points (3x the number of triangles) print(points[:3]) # print the vertices of the first triangle
If you want to save an STL after generate, just use:
pythonwrite_binary_stl(path, points)
Visualizing the SDF
<img width=350 align="right" src="docs/images/show_slice.png">You can plot a visualization of a 2D slice of the SDF using matplotlib.
This can be useful for debugging purposes.
pythonf.show_slice(z=0) f.show_slice(z=0, abs=True) # show abs(f)
You can specify a slice plane at any X, Y, or Z coordinate. You can
also specify the bounds to plot.
Note that matplotlib is only imported if this function is called, so it
isn't strictly required as a dependency.
How it Works
The code simply uses the Marching Cubes
algorithm to generate a mesh from the Signed Distance Function.
This would normally be abysmally slow in Python. However, numpy is used to
evaluate the SDF on entire batches of points simultaneously. Furthermore,
multiple threads are used to process batches in parallel. The result is
surprisingly fast (for marching cubes). Meshes of adequate detail can
still be quite large in terms of number of triangles.
The core "engine" of the sdf library is very small and can be found in
core.py.
In short, there is nothing algorithmically revolutionary here. The goal is
to provide a simple, fun, and easy-to-use API for generating 3D models in our
favorite language Python.
Files
- sdf/core.py: The core mesh-generation engine. Also includes code for estimating the bounding box of an SDF and for plotting a 2D slice of an SDF with matplotlib.
- sdf/d2.py: 2D signed distance functions
- sdf/d3.py: 3D signed distance functions
- sdf/dn.py: Dimension-agnostic signed distance functions
- sdf/ease.py: Easing functions that operate on numpy arrays. Some SDFs take an easing function as a parameter.
- sdf/mesh.py: Code for loading meshes and using them as SDFs.
- sdf/progress.py: A console progress bar.
- sdf/stl.py: Code for writing a binary STL file.
- sdf/text.py: Generate 2D SDFs for text (which can then be extruded)
- sdf/util.py: Utility constants and functions.
SDF Implementation
It is reasonable to write your own SDFs beyond those provided by the
built-in library. Browse the SDF implementations to understand how they are
implemented. Here are some simple examples:
python@sdf3 def sphere(radius=1, center=ORIGIN): def f(p): return np.linalg.norm(p - center, axis=1) - radius return f
An SDF is simply a function that takes a numpy array of points with shape (N, 3)
for 3D SDFs or shape (N, 2) for 2D SDFs and returns the signed distance for each
of those points as an array of shape (N, 1). They are wrapped with the
@sdf3 decorator (or @sdf2 for 2D SDFs) which make boolean operators work,
add the save method, add the operators like translate, etc.
python@op3 def translate(other, offset): def f(p): return other(p - offset) return f
An SDF that operates on another SDF (like the above translate) should use
the @op3 decorator instead. This will register the function such that SDFs
can be chained together like:
pythonf = sphere(1).translate((1, 2, 3))
Instead of what would otherwise be required:
pythonf = translate(sphere(1), (1, 2, 3))
Remember, it's Python!
<img width=250 align="right" src="docs/images/customizable_box.png">Remember, this is Python, so it's fully programmable. You can and should split up your
model into parameterized sub-components, for example. You can use for loops and
conditionals wherever applicable. The sky is the limit!
See the customizable box example for some starting ideas.
<br clear="right">Function Reference
3D Primitives
sphere
<img width=128 align="right" src="docs/images/sphere.png">sphere(radius=1, center=ORIGIN)
pythonf = sphere() # unit sphere f = sphere(2) # specify radius f = sphere(1, (1, 2, 3)) # translated sphere
box
<img width=128 align="right" src="docs/images/box2.png">box(size=1, center=ORIGIN, a=None, b=None)
pythonf = box(1) # all side lengths = 1 f = box((1, 2, 3)) # different side lengths f = box(a=(-1, -1, -1), b=(3, 4, 5)) # specified by bounds
rounded_box
<img width=128 align="right" src="docs/images/rounded_box.png">rounded_box(size, radius)
pythonf = rounded_box((1, 2, 3), 0.25)
wireframe_box
<img width=128 align="right" src="docs/images/wireframe_box.png">wireframe_box(size, thickness)
pythonf = wireframe_box((1, 2, 3), 0.05)
torus
<img width=128 align="right" src="docs/images/torus.png">torus(r1, r2)
pythonf = torus(1, 0.25)
capsule
<img width=128 align="right" src="docs/images/capsule.png">capsule(a, b, radius)
pythonf = capsule(-Z, Z, 0.5)
capped_cylinder
<img width=128 align="right" src="docs/images/capped_cylinder.png">capped_cylinder(a, b, radius)
pythonf = capped_cylinder(-Z, Z, 0.5)
rounded_cylinder
<img width=128 align="right" src="docs/images/rounded_cylinder.png">rounded_cylinder(ra, rb, h)
pythonf = rounded_cylinder(0.5, 0.1, 2)
capped_cone
<img width=128 align="right" src="docs/images/capped_cone.png">capped_cone(a, b, ra, rb)
pythonf = capped_cone(-Z, Z, 1, 0.5)
rounded_cone
<img width=128 align="right" src="docs/images/rounded_cone.png">rounded_cone(r1, r2, h)
pythonf = rounded_cone(0.75, 0.25, 2)
ellipsoid
<img width=128 align="right" src="docs/images/ellipsoid.png">ellipsoid(size)
pythonf = ellipsoid((1, 2, 3))
pyramid
<img width=128 align="right" src="docs/images/pyramid.png">pyramid(h)
pythonf = pyramid(1)
Platonic Solids
tetrahedron
<img width=128 align="right" src="docs/images/tetrahedron.png">tetrahedron(r)
pythonf = tetrahedron(1)
octahedron
<img width=128 align="right" src="docs/images/octahedron.png">octahedron(r)
pythonf = octahedron(1)
dodecahedron
<img width=128 align="right" src="docs/images/dodecahedron.png">dodecahedron(r)
pythonf = dodecahedron(1)
icosahedron
<img width=128 align="right" src="docs/images/icosahedron.png">icosahedron(r)
pythonf = icosahedron(1)
Infinite 3D Primitives
The following SDFs extend to infinity in some or all axes.
They can only effectively be used in combination with other shapes, as shown in the examples below.
plane
<img width=128 align="right" src="docs/images/plane.png">plane(normal=UP, point=ORIGIN)
plane is an infinite plane, with one side being positive (outside) and one side being negative (inside).
pythonf = sphere() & plane()
slab
<img width=128 align="right" src="docs/images/slab.png">slab(x0=None, y0=None, z0=None, x1=None, y1=None, z1=None, k=None)
slab is useful for cutting a shape on one or more axis-aligned planes.
pythonf = sphere() & slab(z0=-0.5, z1=0.5, x0=0)
cylinder
<img width=128 align="right" src="docs/images/cylinder.png">cylinder(radius)
cylinder is an infinite cylinder along the Z axis.
pythonf = sphere() - cylinder(0.5)
Text
Yes, even text is supported!
text(font_name, text, width=None, height=None, pixels=PIXELS, points=512)
pythonFONT = 'Arial' TEXT = 'Hello, world!' w, h = measure_text(FONT, TEXT) f = rounded_box((w + 1, h + 1, 0.2), 0.1) f -= text(FONT, TEXT).extrude(1)
Note: PIL.ImageFont,
which is used to load fonts, does not search for the font by name on all operating systems.
For example, on Ubuntu the full path to the font has to be provided.
(e.g. /usr/share/fonts/truetype/freefont/FreeMono.ttf)
Images
Image masks can be extruded and incorporated into your 3D model.

image(path_or_array, width=None, height=None, pixels=PIXELS)
pythonIMAGE = 'examples/butterfly.png' w, h = measure_image(IMAGE) f = rounded_box((w * 1.1, h * 1.1, 0.1), 0.05) f |= image(IMAGE).extrude(1) & slab(z0=0, z1=0.075)
Positioning
translate
<img width=128 align="right" src="docs/images/translate.png">translate(other, offset)
pythonf = sphere().translate((0, 0, 2))
scale
<img width=128 align="right" src="docs/images/scale.png">scale(other, factor)
Note that non-uniform scaling is an inexact SDF.
pythonf = sphere().scale(2) f = sphere().scale((1, 2, 3)) # non-uniform scaling
rotate
<img width=128 align="right" src="docs/images/rotate.png">rotate(other, angle, vector=Z)
pythonf = capped_cylinder(-Z, Z, 0.5).rotate(pi / 4, X)
orient
<img width=128 align="right" src="docs/images/orient.png">orient(other, axis)
orient rotates the shape such that whatever was pointing in the +Z direction
is now pointing in the specified direction.
pythonc = capped_cylinder(-Z, Z, 0.25) f = c.orient(X) | c.orient(Y) | c.orient(Z)
Boolean Operations
The following primitives a and b are used in all of the following
boolean operations.
pythona = box((3, 3, 0.5)) b = sphere()
The named versions (union, difference, intersection) can all take
one or more SDFs as input. They all take an optional k parameter to define the amount
of smoothing to apply. When using operators (|, -, &) the smoothing can
still be applied via the .k(...) function.
union
<img width=128 align="right" src="docs/images/union.png"><br clear="right">pythonf = a | b f = union(a, b) # equivalent
difference
<img width=128 align="right" src="docs/images/difference.png"><br clear="right">pythonf = a - b f = difference(a, b) # equivalent
intersection
<img width=128 align="right" src="docs/images/intersection.png"><br clear="right">pythonf = a & b f = intersection(a, b) # equivalent
smooth_union
<img width=128 align="right" src="docs/images/smooth_union.png"><br clear="right">pythonf = a | b.k(0.25) f = union(a, b, k=0.25) # equivalent
smooth_difference
<img width=128 align="right" src="docs/images/smooth_difference.png"><br clear="right">pythonf = a - b.k(0.25) f = difference(a, b, k=0.25) # equivalent
smooth_intersection
<img width=128 align="right" src="docs/images/smooth_intersection.png"><br clear="right">pythonf = a & b.k(0.25) f = intersection(a, b, k=0.25) # equivalent
Repetition
repeat
<img width=128 align="right" src="docs/images/repeat.png">repeat(other, spacing, count=None, padding=0)
repeat can repeat the underlying SDF infinitely or a finite number of times.
If finite, the number of repetitions must be odd, because the count specifies
the number of copies to make on each side of the origin. If the repeated
elements overlap or come close together, you may need to specify a padding
greater than zero to compute a correct SDF.
pythonf = sphere().repeat(3, (1, 1, 0))
circular_array
<img width=128 align="right" src="docs/images/circular_array.png">circular_array(other, count, offset)
circular_array makes count copies of the underlying SDF, arranged in a
circle around the Z axis. offset specifies how far to translate the shape
in X before arraying it. The underlying SDF is only evaluated twice (instead
of count times), so this is more performant than instantiating count copies
of a shape.
pythonf = capped_cylinder(-Z, Z, 0.5).circular_array(8, 4)
Miscellaneous
blend
<img width=128 align="right" src="docs/images/blend.png">blend(a, *bs, k=0.5)
pythonf = sphere().blend(box())
dilate
<img width=128 align="right" src="docs/images/dilate.png">dilate(other, r)
pythonf = example.dilate(0.1)
erode
<img width=128 align="right" src="docs/images/erode.png">erode(other, r)
pythonf = example.erode(0.1)
shell
<img width=128 align="right" src="docs/images/shell.png">shell(other, thickness)
pythonf = sphere().shell(0.05) & plane(-Z)
elongate
<img width=128 align="right" src="docs/images/elongate.png">elongate(other, size)
pythonf = example.elongate((0.25, 0.5, 0.75))
twist
<img width=128 align="right" src="docs/images/twist.png">twist(other, k)
pythonf = box().twist(pi / 2)
bend
<img width=128 align="right" src="docs/images/bend.png">bend(other, k)
pythonf = box().bend(1)
bend_linear
<img width=128 align="right" src="docs/images/bend_linear.png">bend_linear(other, p0, p1, v, e=ease.linear)
pythonf = capsule(-Z * 2, Z * 2, 0.25).bend_linear(-Z, Z, X, ease.in_out_quad)
bend_radial
<img width=128 align="right" src="docs/images/bend_radial.png">bend_radial(other, r0, r1, dz, e=ease.linear)
pythonf = box((5, 5, 0.25)).bend_radial(1, 2, -1, ease.in_out_quad)
transition_linear
<img width=128 align="right" src="docs/images/transition_linear.png">transition_linear(f0, f1, p0=-Z, p1=Z, e=ease.linear)
pythonf = box().transition_linear(sphere(), e=ease.in_out_quad)
transition_radial
<img width=128 align="right" src="docs/images/transition_radial.png">transition_radial(f0, f1, r0=0, r1=1, e=ease.linear)
pythonf = box().transition_radial(sphere(), e=ease.in_out_quad)
wrap_around
<img width=128 align="right" src="docs/images/wrap_around.png">wrap_around(other, x0, x1, r=None, e=ease.linear)
pythonFONT = 'Arial' TEXT = ' wrap_around ' * 3 w, h = measure_text(FONT, TEXT) f = text(FONT, TEXT).extrude(0.1).orient(Y).wrap_around(-w / 2, w / 2)
2D to 3D Operations
extrude
<img width=128 align="right" src="docs/images/extrude.png">extrude(other, h)
pythonf = hexagon(1).extrude(1)
extrude_to
<img width=128 align="right" src="docs/images/extrude_to.png">extrude_to(a, b, h, e=ease.linear)
pythonf = rectangle(2).extrude_to(circle(1), 2, ease.in_out_quad)
revolve
<img width=128 align="right" src="docs/images/revolve.png">revolve(other, offset=0)
pythonf = hexagon(1).revolve(3)
3D to 2D Operations
slice
<img width=128 align="right" src="docs/images/slice.png">slice(other)
pythonf = example.translate((0, 0, 0.55)).slice().extrude(0.1)
2D Primitives
circle
line
rectangle
rounded_rectangle
equilateral_triangle
hexagon
rounded_x
polygon
Contributors
Showing top 4 contributors by commit count.